Last weekend was my third annual Christmas Craft Party. There's nothing better than spending an evening sitting around eating and chatting with friends from my art class while we make Christmas crafts.
So here is what we made this year.
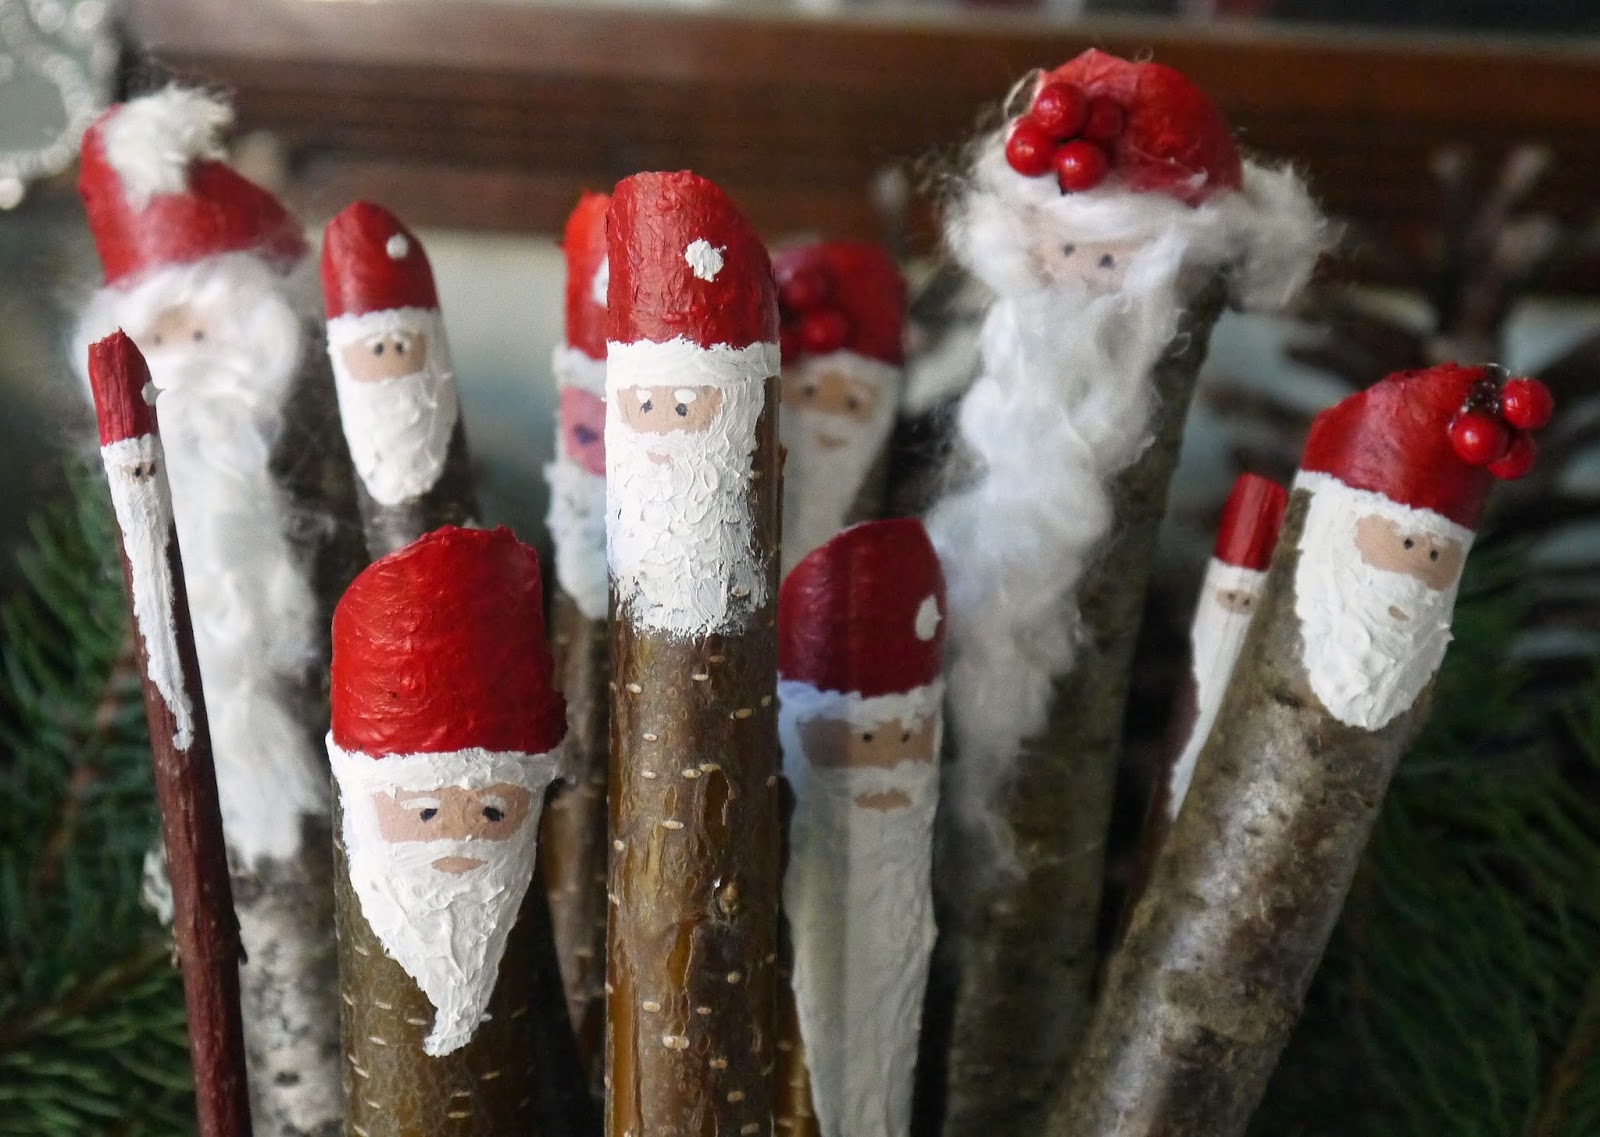
1. TWIG SANTAS
What you need:
- twigs and sticks in a range of thicknesses
- acrylic paint - red, flesh-coloured, white
- corn starch
- paint brushes
- trays for the paint
- popsicle sticks for mixing
- black Sharpie
This was probably my favourite craft of the evening. My Mom and I collected twigs at the cottage about a month ago so we could make these Santas. We chose twigs that were a range of thicknesses from about a pencil size to a couple of centimeters across. We used the large clippers to cut the end on an angle to form the hat. Then we painted the hat red and the face using flesh-coloured paint. We mixed corn starch with white paint to make the beard fluffy and we added eyes using a Sharpie. I made more Santas on the day after the party (it isn't easy for me to get much done during the party itself so I took advantage of having everything set up and I crafted the next day too before I cleaned up) and on some of the Santas I used fluffy white wool for the beard, instead of paint.
2. TWIG LETTERS
This craft really got everyone being creative and making different things which is always fun to see what everyone does.
What you need:
- twigs and sticks in a variety of sizes and shapes
- wire to hold the sticks in a round shape
- ribbon, wool, twine, baker's string, fake berries to decorate the letters
- blocks of wood
- clippers, scissors, wire cutters
- glue guns
My Mom and I gathered all the twigs we would need for this craft at the cottage too. I kept them in the garage so they would stay pliable which seemed to work. I want to give a shout-out to Lowe's and Rona as both stores gave me wood blocks for free and even cut a few scrap pieces up for me. I was so grateful as I didn't want to spend a lot on the craft projects and I had initially tried one other hardware store and they had said no, so I was very happy when Rona and Lowe's were so generous.
I made more letters on Sunday. I finished up "NOEL" which you can see in the back row of the first photo that is missing an "L" (get it, no 'L'. Ha! Ha! I crack myself up) and made "JOY" as well.
3. CARVED ORANGES
We've done this craft for three years in a row so this will be the last one, but I really wanted to do it again so I would have a bowl full of carved oranges. I only had four and that just isn't a good number to display so now I have seven and I'm good to go.
What you need:
- oranges
- carving set
- bowl to put peels in
The only trick to this craft is to make sure the oranges are really dried out before putting them on display. I do that by putting them on our floor heat vent for two weeks and then they are fine.
I have to say that this craft party is one of my favourite Christmas activities. I love sitting around chatting and visiting with people who like to play with twigs.
By the way, if you are curious what we made in previous years, you can see them here, here, and more details here.


.jpg)


.jpg)


Ohhh I just adore all the fun you had. The santas are my favorite - but the others are fun too. What a grand way to get together with friend to do some crafting - now I'm going to read the posts from the years past and start planning for a craft party next year.
ReplyDeleteWhat a great idea. I might try this next year.
ReplyDeleteOh wow, you are a crafting genius! All such great ideas. I love the twig Santas!
ReplyDeleteFun, fun, fun. I love them all but I just might take a shot at the twig letters.
ReplyDeleteThe twig Santas are too cute and so much fun. I'd like to make a few!
ReplyDelete